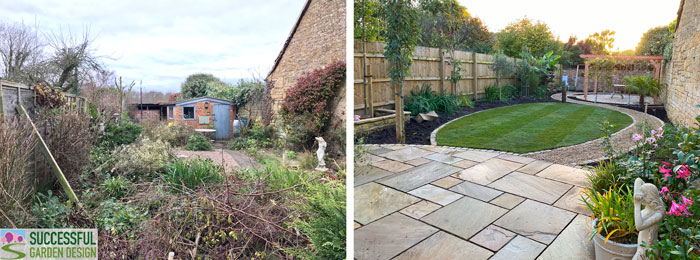
This week we take a look at Andrew & Jill’s UK garden and see what they achieved after they did the Fast-Track Garden Design Formula Course. Here’s what they started out with…
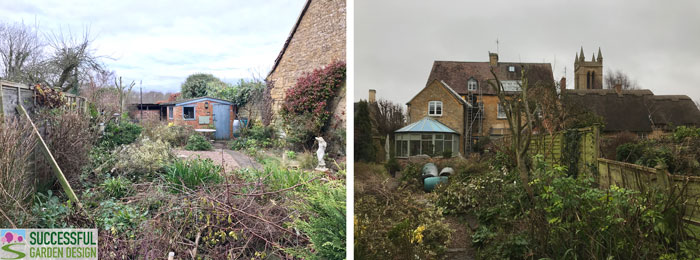
We bought the house two years ago, and the garden was a huge compromise. We inherited a garden that was smaller than we wanted, which was long and narrow, and in a terrible state!
The renovation of the house took priority, so the garden became a two-year project fitting around the builders. We wanted to make the garden look as wide as possible, while providing interest and separate areas to relax and entertain.
We also wanted the garden to be private where possible, and to make the best use of the setting and stone walls, one of which was totally hidden behind the workshop. We definitely wanted a lawn to soften the area, and to absorb some of the heat from the walls.
The back of the house faces west, so the walls are south facing and absorb lots of heat. The views from each of the rooms at the rear of the house all had to work, and the design had to lead the eye slowly to the bottom, and out to the wider view to the woods and hills.

Andrew & Jill’s Garden Design and Build Process
In terms of how we got to where we are, the process took 2 years and roughly followed this process, but it wasn’t a conscious process, it was how we tackled it!
- taking stock of what was there, and what was worth keeping
- removing all good plants and shrubs into pots
- clear the space!
- replace all wooden fences
- decide what to do with the brick workshop, balance usefulness with how we use the garden, decided to demolish
- sort out the privacy issues inherent in a semi-detached, installed pleached hornbeams
- stared at the blank canvass and wondered what to do with it!

- asked a landscaper we knew for ideas, considered paying a designer
- watched lots of TV programmes, most useful was ‘your garden made perfect’, marvelled at how little could be achieved with so much money!
- found your online course, and also bought a book on garden design and a book on garden lighting. The garden design book was of very limited value on layout, but was useful on planting. The lighting book had some good ideas. Your course was excellent.
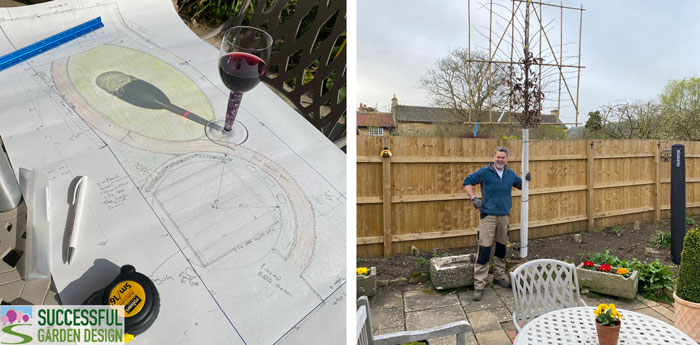
- completed the course, and visited as many gardens as possible for ideas, measured the plot and transferred it onto a large piece of wallpaper backing paper
- came up with a design we mostly liked, but realised it needed a tweak with the flow of the path, so asked you to review and provide comments which refined the design to what we see now, which flows very well
- engaged the landscaper to implement the design, refined as we implemented, including adding the sleeper wall to accentuate the curve around the patio
- we still have the 6*4 painted shed to install in the bottom left to complete the garden
I would say the best thing we did was to not pay too much attention to what other people suggested, however well meaning, and stick with what you want to achieve, no one else lives and uses it as you do!Best Regards,Andrew.
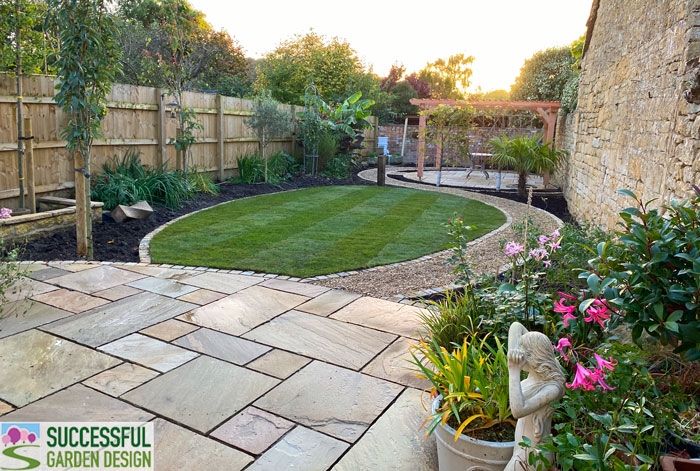
Many thanks to Andrew and Jill for sharing their garden design and build experiences with us. They’ve done a truly fantastic job and I only gave them one main tip and that was to have the path next to the lawn and not the wall. I hope they will keep us updated as the garden progresses :o)
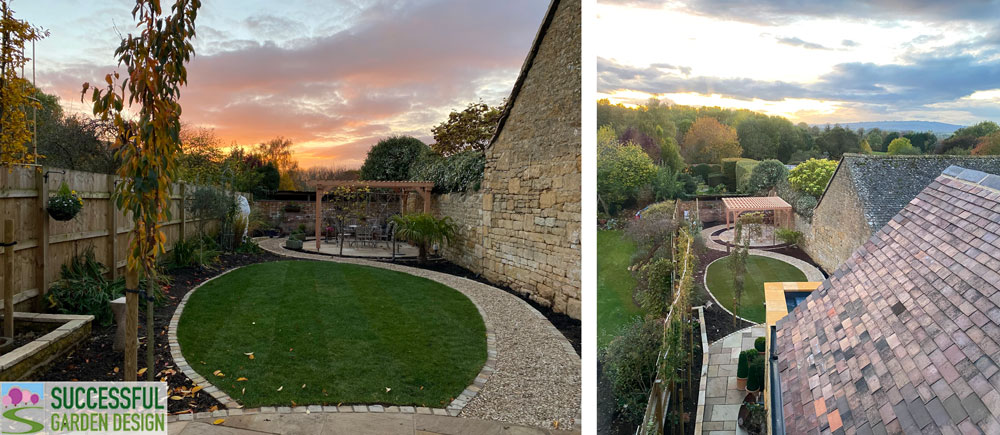
They did keep me updated and here is the 2022 version…


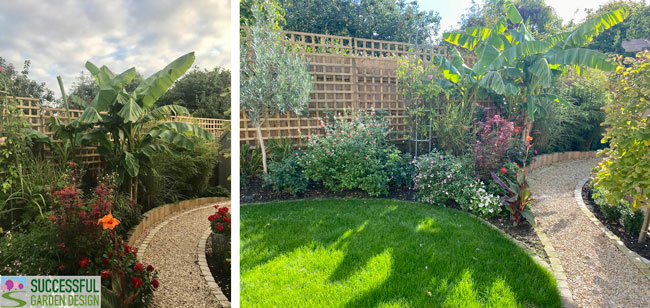
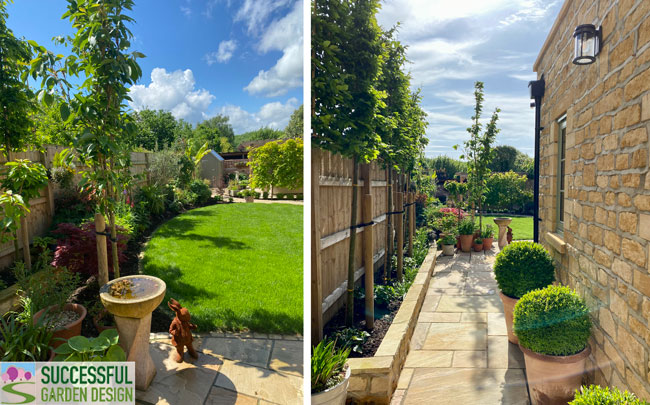
Many thanks for the update, Andrew & Jill – the garden looks absolutely stunning! What an achievement from where you started.

Learn how to design your garden…
If you’d like to do the same garden design course Andrew & Jill did then check out The Fast-Track Garden Design Formula Course.
4 replies to "Andrew & Jill’s Long Garden Re-Design + UPDATE"
What a stunning transformation. Well done Andrew and Jill, and of course you Rachel. I am truly envious of what they have achieved. I have a question for you Rachel and it concerns tree roots by walls and pathways. I see that Andrew and Jill have planted pleached trees alongside a small wall and path, and it is something I often see other gardeners on tv do. How do you stop the tree roots from cracking the walls or lifting paving slabs?
Hi Francesca,
Many thanks for your comment :o)
With regards to the tree roots, firstly be careful what type of tree you choose – so not an oak or cherry tree family where they have surface roots that are likely to push up paving. Look at trees planted in commercial areas and you’ll see the types that don’t tend to cause issues like smaller silver birch.
If you’re concerned about the tree roots, you could always put a specialist root barrier material next to paving or walls that will stop them going under.
Love this transformation and hearing the process. Cheekily, these are the exact type of paving slabs I have been searching for. Might Andrew and Jill be willing to share which slabs they are? I’m having a real job finding ones I like for my garden.
Hi Alex, I don’t know if Andrew or Jill will answer but the paving looks like a sandstone to me – take a look at https://www.successfulgardendesign.com/product/bradstone-natural-sandstone-paving-sunset-buff-600-x-300-85-per-pack-2/ or if that’s not it take a look at the Global Stone website, I’m sure they do something similar.